N8N: RabbitMQ + HTTP + Slack - part 1
In this blog post we will setup a rabbitmq trigger in n8n, receive a message and save our workflow.


At Kalvad, we like to use N8N and RabbitMQ to manage workflows asynchronously, and occasionally use slack on top of it to notify us in case something goes wrong (on very specific scenarios, the rest of the time we have our own alerting).
In this mini series we will go through a simple use case, where we receive a JSON formatted message in a Rabbit MQ queue and based on the result, we will call an HTTP API of our own or send a slack notification. In this article I will assume that you already have all the tools required (if you need help to install/run n8n we wrote an article about it some time ago or simply check the official documentation which is very straightforward).
Step 1: Setup Rabbit MQ
First of all, we need to setup rabbit MQ to receive messages into a queue, to do so we will go through the essential. You can obviously do things in a much more complex way using exchanges, options and so on but for the sake of example we will keep it simple here.
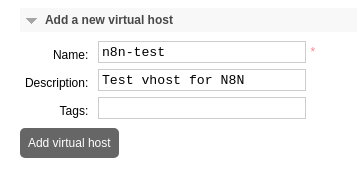
Let's first create a vhost named n8n-test using the web interface (Admin tab):
Next, we are going to create our queue which we will call task in the vhost we just created (queues tab):
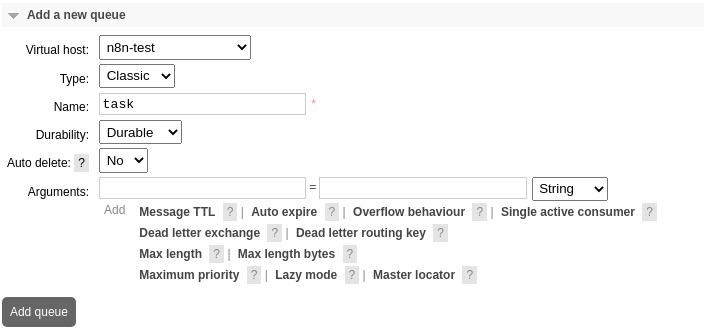
We will use all default options and hit "Add queue".
That's it for RabbitMQ, like I said we keept it simple !
Step 2: Setup the Rabbit MQ trigger in N8N
Now that our Rabbit MQ instance is ready and configured, let's start our N8N workflow with a simple trigger plugged on our vhost n8n-test and the queue task.
Go in the menu "Workflows" then click on "New". It will open a new canvas with a default "Start" node which you can ignore. It is not possible as of now to disable/delete it, so we will just not use it. In N8N the rule is that (and in workflows generally) you need a start, you can either use the default "Start" or a trigger.
Next you need to click on the orange "+" button top right to open the list of available nodes. We are going to search for "Rabbit":
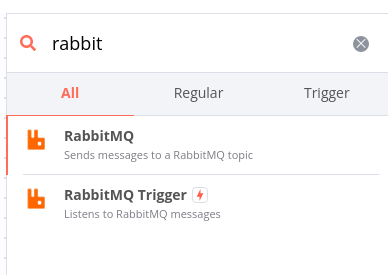
Great, so we will pick the second one (RabbitMQ Trigger) which is going to automatically add the trigger to the canvas and open the following modal:
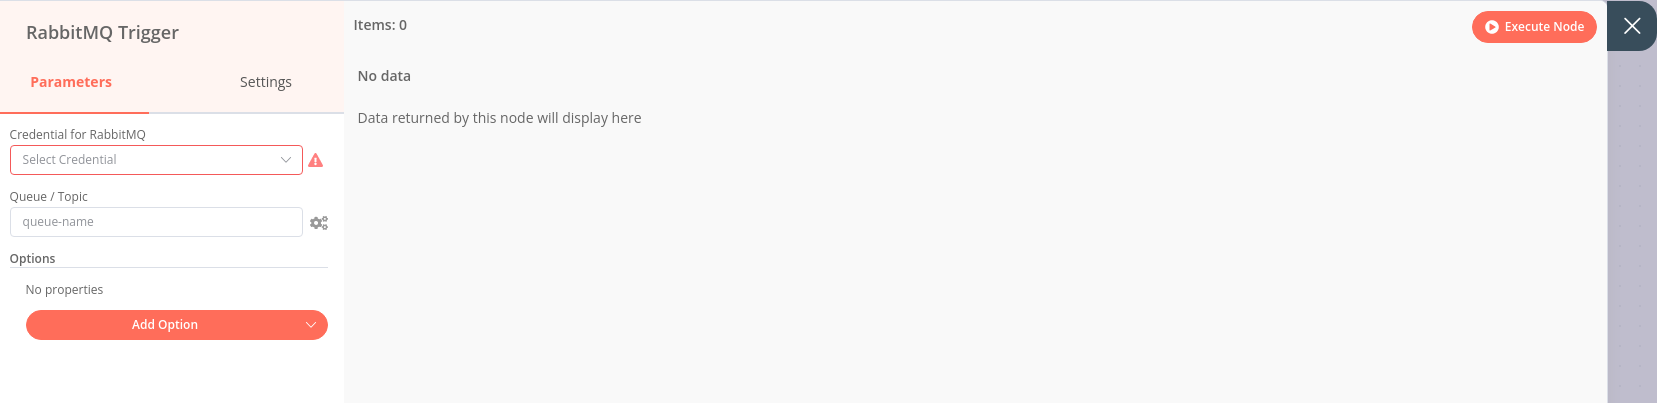
Because it is the first time we use it, we need to add credentials so we can connect to our RabbitMQ instance. Click on the drop down "Select Credentials" and then "-Create new-", it will open another modal:
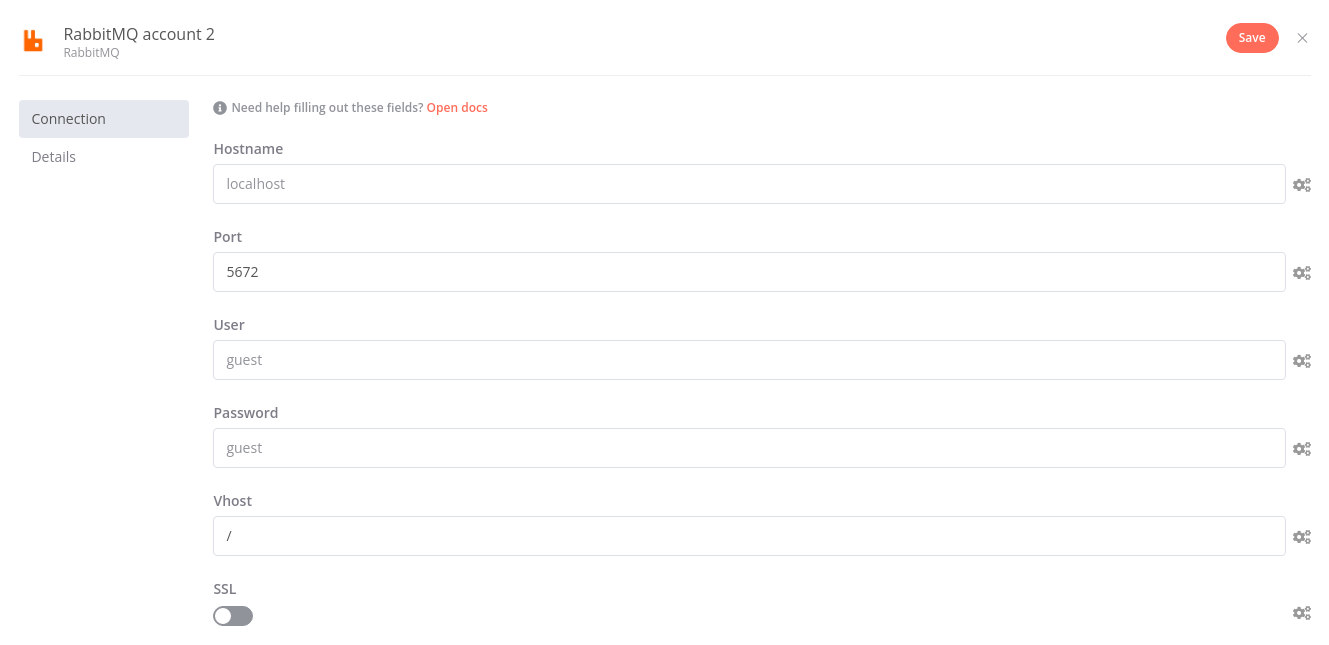
Fill all the fields and make sure not to start the vhost with a slash. Here, if you are following this guide, just write n8n-test for the vhost then hit "Save" on the top right. Note that you can also rename the default credentials name on the top left "RabbitMQ account 2" by clicking on it. I renamed it to "n8n-test-account".
Now that's it done, let's finish the configuration of our trigger as follow:
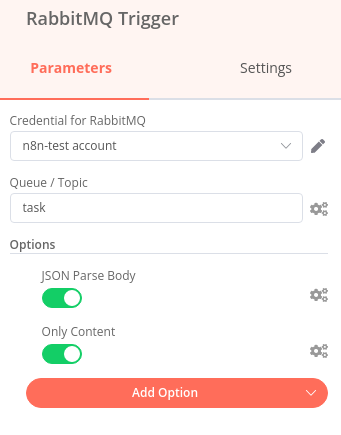
You can find the "JSON Parse Body" and "Only Content" options by clicking on the orange "Add Option" button and then clicking on the radio button to enable it.
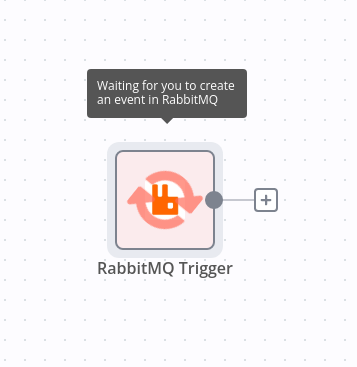
Now to test if it's working, click on the "Execute node" button top right of the modal. You should see a loading icon, if that's the case you can close the modal and you should see this happening in your canvas (if that's not the case, you might have made a typo entering your RabbitMQ credentials or it is possible that your user does not have access to the newly created vhost):
Now, let's send a message to check if it works as expected. Let's go back in RabbitMQ's web interface, click on the "Queues" tab, then on our task queue, and there should be a section "Publish message":
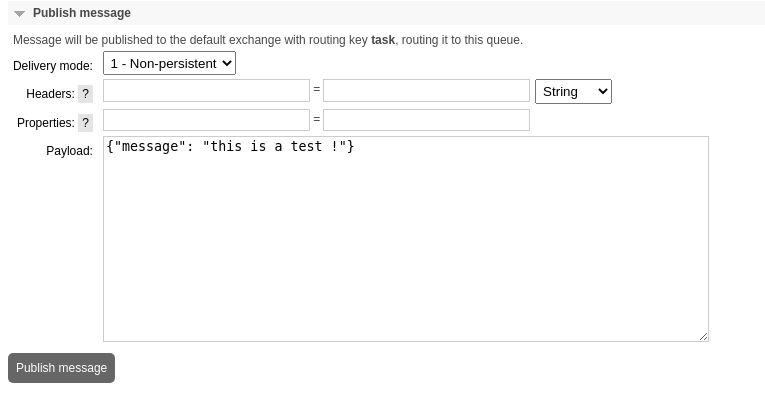
Let's write some dummy (valid though) JSON and hit "Publish message". You should get this message:

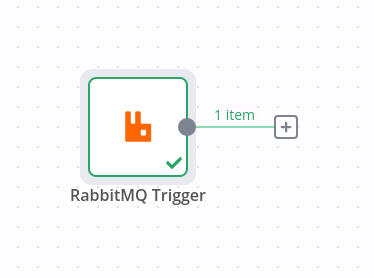
Nice, now let's go back to our N8N canvas and you should see this:
Neat. Even neater, if you click on your node, you will see the content of what was received:
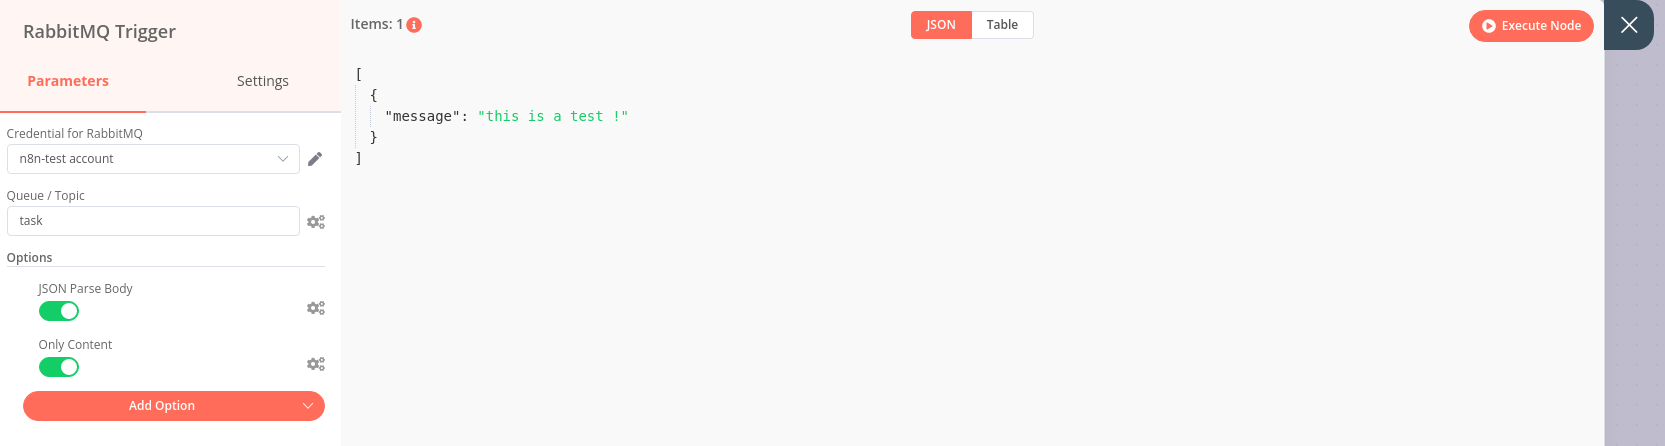
Note that I had to click on "Json" at the top of the modal, the default is "Table". Because this is a test execution, the node stopped working, so if you send another message right now it will stay on the queue, you need to click again on "Execute node" to process it.
Step 3: Save the workflow
When you are satisfied with your progress, you can click on "Save" on the top right part of the screen and you can rename your workflow by clicking on its default name top left "My Workflow". Let's call it "My task" because we just love meaningfulness.
We can also add tags, personally I like to simply have 2 tags: production and staging as I like to maintain 1 workflow per environment (so for instance for email flows, you can simply unplug the node sending emails or use a different set of credentials). Let's add a tag staging now.
When you are ready to go live with your workflow, you need to toggle the "Active" radio button on your canvas, top right.
So now you should have this on your screen:

If you want to keep some sort of backup of you work, simply go in the menu, "Workflows" then "Download". You will get a JSON file which you can then import (from file/from URL).
Conclusion
That's it for part 1 which is N8N + RabbitMQ, we learnt the basics of N8N and made our own RabbitMQ trigger. In the second part we are going to check the HTTP node and the conditional node to use some sweet if and else statements, so stay tuned !
If you have a problem and no one else can help, maybe you can hire the Kalvad-Team.